How to Post 3D Images to your website
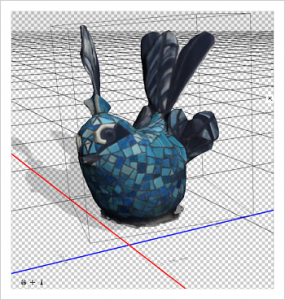
 3D images are a great way to display merchandise for online items. One of my clients sells custom made, hand crafted mosaic tile sculptures of animals, such as dogs, cats and birds.
The scanning process with 3D images involves a series of photographs that can be shot with a smart-phone application. I used 123D, by Autodesk that stitches about 30 shots together and loads them to a viewer that can be linked to a page, or post with an iframe code.
Objects that are made of glass, or highly reflective, are not suitable for 3D scanning. Lighting is also key. Overcast days are great for scanning, so the objects do not cast a shadow. Background contrast is also a consideration; it needs to be broken up, unlike the process of using a green-screen.
- Use your smart phone to scan an image in 3D using AutoDesk 123D Catch (DISCONTINUED)
- Download the .obj file (downloads in the mesh folder)
- Modify the .obj image in Meshmixer by AutoDesk
- Enhance the .obj image in Photoshop 3D
- Upload the file to Scetchfab from Photoshop
- Imbed the iframe code to your page or post page
Meshmixer requires some basic knowledge of 3D objects, such as the X, Y & Z. axis. One of the first things to do is modify the orientation of the object in the “edit” mode. Then go to “transform” in the sub-menu to select the object and rotate it to the correct orientation on the plane. Usually by default, it’s on it’s side with the ground plane sliced through the center of the object. After that, go to the “select” mode to grab the unwanted background imagery using “command-X” to delete it.
Photoshop 3D can be used for additional cleaning up, but does have a fairly steep learning curve.
Using the viewing platform with 123D eliminates the need for a plug-in or loading the .obj file, which was problematic on my WordPress sites. I ended up using Scetchfab Pro viewer because it uploads directly from Photoshop. The pro plan allows me 20 annotations per month for $10. The basic plan is free with 5 annotations per month.